Tuesday, January 22, 2013

Xtracycle shakedown booze cruise

With my Stumpjumper Xtracycle almost completed, it was time for another shakedown cruise. My original shakedown cruise had occurred a few weeks earlier after much of the construction that affected rideability was completed. That test run told me that the bike was shifting fine, but that a brake cable hadn't been tightened enough. Also, I'd left the handlebars un-cut to their maximum width. I didn't like the feel of those so one of the first things I did after returning was to cut one inch off of either side.

I find the easiest way to cut bars to length is by using a plain old plumber's pipe cutter. You can find them at pretty much any hardware store, although the cheaper ones like mine will require frequent replacement of the low quality cutter blades. My blade had already gotten fairly nicked and bunged up so I had a bit of a rough time cutting the bars down to size.


At the best of times you'll still need to use a file to clean up the edge of the cut. I had to work it a bit more because my cutter was beyond dull. Use a flat metal file to grind down the outside edges of the bar.


After taking care of the outside you want to use a round file, like a chainsaw sharpening file to get any burrs off the inside of the bar.


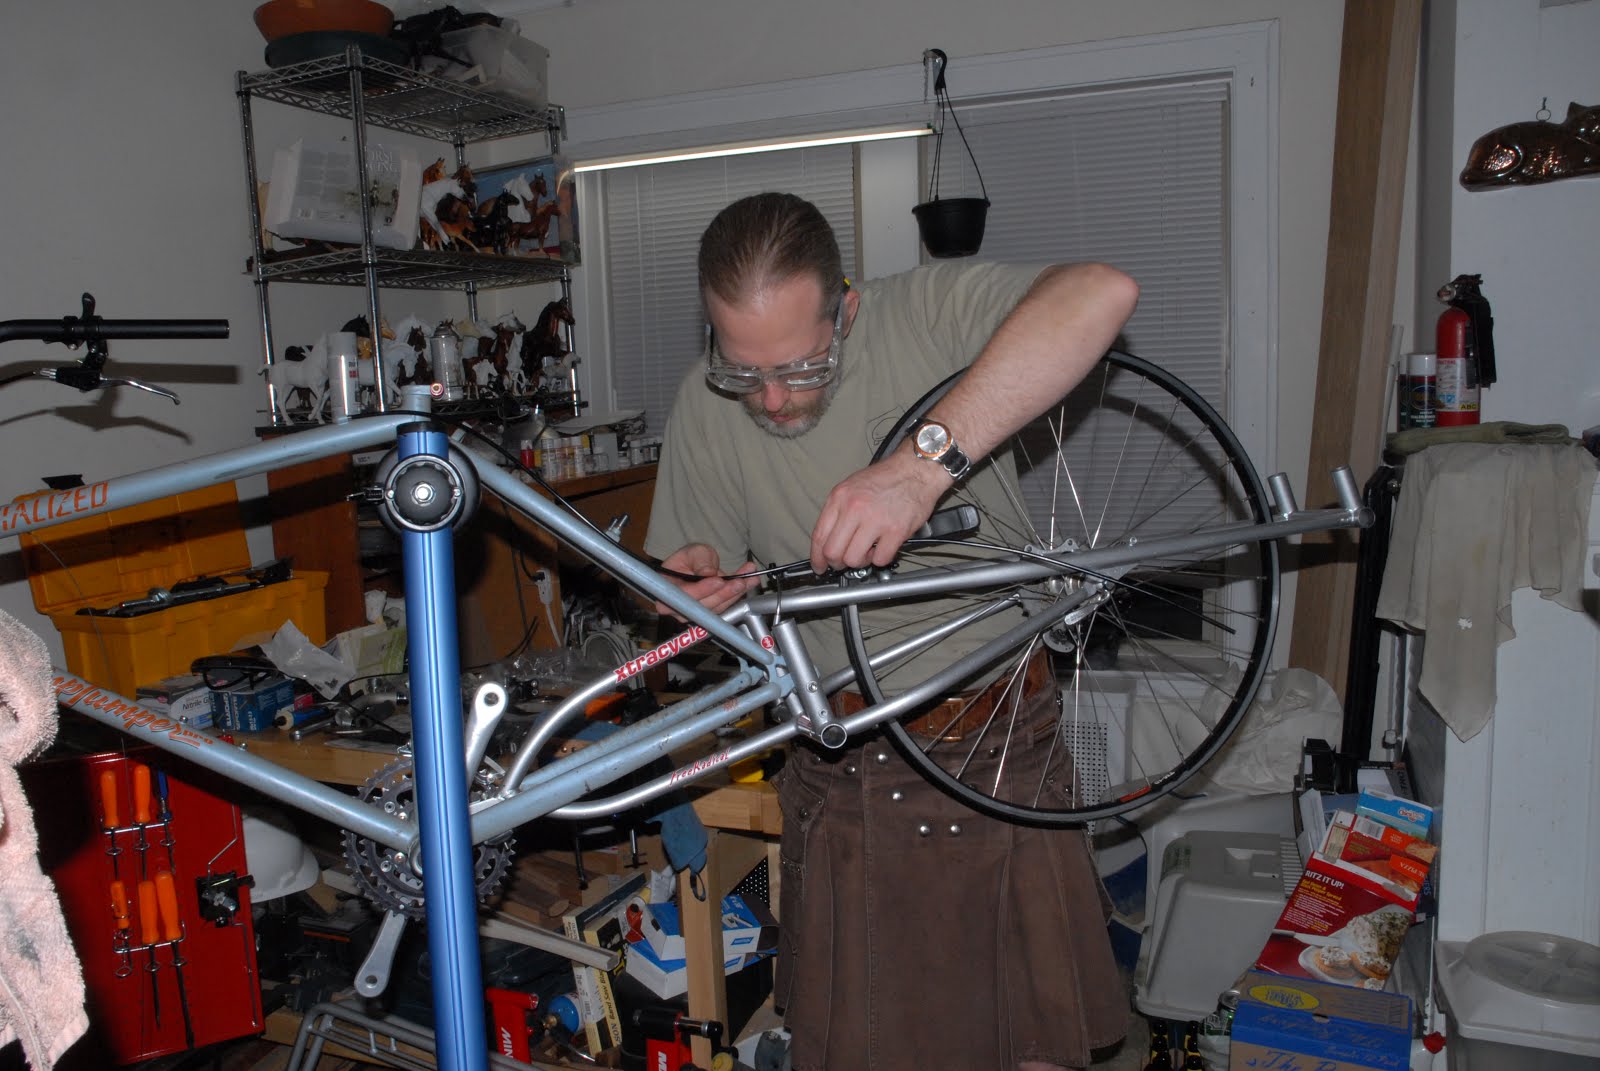
Now with the bar ends fitted back in place, the bike was ready for another shakedown cruise.


So, a few days later I sent a message to my semi-regular riding buddy Bryan and asked if he'd like to put some miles in while I worked out any more kinks in the Xtracycle build. He was up for it so we elected to meet halfway from both of our houses out in front of the Columbia Yacht Club on the Lakefront Path. Alas, I got a later start than intended and so Bryan met me along the path about a mile and a half south of the yacht club. We met up in front of the 31st Street Marina, which had just been completed at the beginning of the previous summer.

Bryan walked around the newly completed Xtracycle and his practiced eye settled on the long rise to the quill stem along with the steep angle of the stem. "That frame's a little small for you isn't it?" he asked me.

"Back in the day, as you kids like to say (he's 15 years my junior), we used to run our mountain bike frames the next size down. It made for a stiffer frame and made it more maneuverable on tight singletrack and in the really technical bits," I replied.

I also replied that as I had the bike set up originally, the stem was a lot lower than the seat which was great for aggressive off road riding, but not for lengthy tours on the road, and certainly not very comfortable for the "wedding tackle" in the longterm. Next on our agenda, was a childish desire to indulge our selves in taking turns riding on the back of the bike. I started out with all 6 foot plus and 200 pounds of Bryan on the back. The bike felt incredibly wobbly and you could feel a lot of flex in the frame due to the way the FreeRadical joins to the donor bike frame.

It was a bit disconcerting to pedal the bike with an awkward, top-heavy load on the back. Next up it was my turn to ride on the flight deck with Bryan pedaling. I'd call what I experienced, something akin to mild terror. It was somewhat like riding a rickety old roller coaster at the State Fair when I was a kid. Mildly thrilling with the underlying, mounting fear that the whole flexy wobbly thing was going to collapse under you and leave you bloody and broken in a pile of twisted metal on the ground.

So, I think we easily established that the Xtracycle is not meant to support 6 foot tall 200 pound males but instead is more restricted to very small children and petit, size 0 models. We both suspect that the Xtracycle performs much better with the bulk of its weight mounted low versus upright and swaying dramatically.

We pedaled away from the parking lot and north along the path, with an aim to head over into the city and get a burger before continuing westwards to hit up the North Shore Channel Trail. Our original burger joint was to be Kuma's Corner, but a change of plan due to my late start had us settling for merely tooling around in the Loop and parts north instead of heading out to the North Shore Channel Trail. A couple glamor shots were taken before leaving the path though.


We made our way instead over to The Haymarket Pub & Brewery on the corner of Randolph and Halsted. The Pub takes its name from the area of town which is also famous for the Haymarket Riot, also called the Haymarket Affair or the Haymarket Massacre. It was one of the early defining points in the burgeoning labor rights movement. The food was tasty and the beer excellent. I meant to get a picture of our food before we tucked in, but alas hunger took over and when I remembered the desire for a photo, my plate had become a non-photogenic mess of half-eaten burger and french fries.

I have to confess, I don't go out much and I deplore the price of beer at pubs. I can eat and drink way cheaper at home. However, I was delighted to learn of the concept of the "flight" which had been alien to me until this days excursion. The notion that you could purchase a sample of tiny four ounce glasses of various beers for the price of a single 12 or 16 ounce beer intrigued me and took some of the sting out of the cost. Of course some of this is because of my frugal Scottish nature. I'm allowed to call myself a cheap bastard, you aren't.

That may have been Bryan's Acrimonius Barrel Aged Imperial Stout on the left and my Truculent Imperial Pilsner.


I resolved to seek out flights or four ounce sample size glasses where available when cycle touring brew pubs. It seems like a great way to sample several different beers for not a whole lot of cash outlay. We finished up our brews and moseyed across the street to MOX Multisport, a bike shop, so Bryan could add some air to his rear tire and possibly purchase some CO2 canisters for his pump. MOX was a tiny little specialist shop apparently concerned mostly with the triathlon and time trial crowd. A handful of some lovely fast looking bikes but by no means a full service shop with a wide selection of either bikes or other kit.

From MOX, we wended our way further north and west alighting at the location of Tati Cycles, a local purveyor of classy bikes along with classy attire. They apparently have a weird, almost non-existent schedule of actual hours when the shop is open. Alas, they were closed when we rode by. I could swear we saw someone working inside, but by the time we locked up, the apparition had vanished and the door was locked, the shop lifeless.


We ventured further north and west into the neighborhood of Logan Square, allegedly the hipster capital of Chicago. I was hoping to see some more single speed and fixie bikes other than Bryan's. I was really looking forward to seeing someone on a bike with matching gold rims and chain, swigging a PBR in their skinny jeans, giving the finger to someone in a car they'd just cut off as they ran a red light. Alas it was not to be. Apparently it was too cold for the hipster fixie crowd as we were the only people on bikes anywhere in the vicinity.

We cruised by Dunlay's On the Square, where a buddy of ours, Erik, is the head chef or kitchen manager or something. I can't keep the professional restaurant kitchen hierarchy straight, but Bryan and Erik seem to try tirelessly to educate me on the finer points of professional cooking for other people. Feeling thirsty from our exertions, we sampled a flight apiece.

I had the Hopster, but was not sure if the pun on hipster and their location in Logan Square was intentional. Two of the beers, Revolution and Half Acre are both Chicago locals. I'd had Half Acre stuff before and liked it, but the Revolution was a first for me. I liked it better than the Rogue sample, but then again I've never really liked much of anything from Rogue, it always tastes far too piney for me.


Bryan had the Cabin Fever Reliever flight, but alas the Lagunitas selection was out so he had to substitute. I forget what his substitution was, but we ended up switching, his Lagunitas substitute for my Rogue. We both finished our beers happy and hit the road again.


We checked out a large monumental column across from the restaurant before heading back east towards the lake. Bryan tried riding up the smooth marble edging of the steps to the right of the column, only to lose traction and come down hard upon his top tube. His Facebook posts the next day regaled all of his readers with tales of a swollen testicle. Kids, they never learn do they?


We ended up back near the lakefront in a park where our ride had now seemed to take on a pose-the-bikes-by-a-monument theme. We parked them in front of a half-naked statue of Goethe, who also has a street in Chicago named after him. Although, native Chicagoans will tell you the street is not pronounced "Ger-tuh" but is instead pronounced, "Go-eth-ee." Phillistines!


Next up was Alexander Hamilton, in bad need of re-gilding I might add.


As darkness was quickly approaching, we parted ways when we hit the Lakefront Path once again. Bryan headed north while I turned south. Overall I think it was a good shakedown cruise. There was a stiff wind blowing from the south as I headed home so I really felt the wind resistance of the upright pedaling position along with the lack of good aero positions to get down out of the wind. My daily commuter is a drop bar touring bike which while not exactly fast, at least allows me to get down out of the wind somewhat if I need to. Additionally, I found that I prefer the more stretched out position that I have on the commuter. The handlebar is three inches closer on the Xtracycle when measured with the nose of the saddle as a reference point on the two bikes.

Already the wheels are turning in regards to how to change the riding position slightly to make it more like my everyday bike. I found the adjustable stem, made by Zoom, to be utter junk. The mechanism that holds the stem locked in at a specific angle is not firm enough, even with the bolt tightened all the way. As a result, the stem can move upwards a couple millimeters or more, alarmingly, especially when pulling upwards on the bar as you attempt to accelerate away from a dead stop. I'll be replacing the Zoom stem with a quill-to-threadless adapter that will allow me to use a variety of threadless stems, both in angle and extension.

Also, even though I installed bar ends I still feel a decided lack of hand positions. I find that if I don't have the option of changing my hand positions regularly enough, or that I don't have enough variety of positions available I start to suffer from aches and pains in the shoulders as well as my elbows and hands. I find that adhering to the same limited positions tends to make me want to unconsciously lock my elbows and hunch my shoulders.

So, a change from the riser bar will be in order as well. Several other Xtracycle owners utilize trekking, or "butterfly" bars and seem to like them well enough, so I think I may give one of those a try, or possibly some version of an H-bar like the Jeff Jones
. Either way, I need to get more hand positions and get my riding position lowered into a bit more comfortable position for me. As always, I think bikes are a work in progress, at least for me. I think that is a good thing, because it gives me a chance to tinker and I do love an evening in my shop with a bike in the stand and a beer close by.

Tuesday, January 15, 2013

The birth of an Xtracycle: Part 3

I managed to spread out the construction on the Xtracycle over several nights and weekends. A couple of the last tasks to be completed before a test ride was installation of pedals, the saddle, and a deck to attach to the P-racks. I was able to continue to use my old seatpost although I wasn't sure it would work with my new Brooks B17 saddle. I struggled for ages trying to find a truly comfortable saddle. Once I tried the B17, there was no going back. The B17 on my commuter bike has over 5,500 miles on it and was amazingly comfortable right out of the box. The Brooks saddle would end up being probably the single most expensive component to go onto the Xtracycle.

For pedals the choice was easy. I was already running Crank Brothers Candy 1 pedals on my daily commuter bike so it would be easy to switch between bikes using the same shoes. I also like that all of the Crank Brothers pedals can be rebuilt which increases their longevity and long term usefulness. I also like the Candy pedals because they have just enough of a platform that I can keep a foot clipped out while riding in tricky traffic situations, in case I need to put a foot down quickly.


The pedals of course come with cleats and shims which will go in the spares box for whenever I need to replace the cleats already installed on my shoes.


The Candy pedals install easily with an 8mm Allen wrench.


Running the shifter cable to your rear derailleur might require the use of a an Avid Rollamajig to prevent excessive cable drag from needing a huge loop of housing running into the rear derailleur. Xtracycle provide the Rollamajig in with the parts box in case your mountain bike frames cable routing necessitates its use. Because the Rollamajig uses a roller wheel, it allows essentially a 90 degree turn to the shifter cable without creating binding or drag that would happen with a regular housing bent at 90 degrees.


The Rollamajig can only be installed one direction to work correctly. Where it attaches to the derailleur it uses a small ball and T-shaped piece which goes into the barrel adjuster on the derailleur.


Next up was finding some way to affix the P-racks so that they wouldn't move or shift when going over bumps. The Freeloader bags that Xtracycle makes have straps that hold them in place and can help hold the P-racks down more securely. However, I intended to make my own bags and I also wanted the security of using some sort of clamp that will securely hold the P-racks to the FreeRadical.

Xtracycle makes an accessory that they call Watchamacollars
which can securely hold the P-racks in place. They also contain an internal O-ring to help prevent water infiltration down into the FreeRadical. At the time I was buying all of my parts, Xtracycle was selling Watchamacollars for $35 per set. I didn't want to spend $70 on them so I looked around for alternatives. Suggestions from the Xtracycle Yahoo group, Rootsradicals led me to purchase double-bolt seatpost clamps in 25.4mm diameter.

I needed to add some shims and some O-rings to make sure everything fit securely. All told I spent about $30 to make my own imitation Watchamacollars. They're not quite as pretty as the Xtracycle ones but they get the job done. I used copper pipe fittings and a cut up old seatpost to make my shims. Originally I wanted to use electrical tape to seal the joint between the P-rack and FreeRadical. The tape didn't work too well so I ended up springing for four suitable size O-rings for $4.


Bottom shim in place with O-ring on top.


I tried to set up the collars so that the screws would be difficult to get to in case some would-be thief wanted to try to steal my P-racks and deck.


One of the last things to be installed on the bike was to be a wooden deck to go over the tops of the P-racks. Xtracycle sells their own versions for anywhere from $60 to $70. I was able to purchase a piece of Baltic Birch plywood for only $17 which gave me enough material to make the deck and a pair of running boards. However, halfway through the process of applying a finish to the boards, I got to thinking about the durability of finished wood when exposed to the extremes of temperature and nasty stuff like salt.

I inquired on Rootsradicals about making alternative decks using recycled plastic lumber. As I was searching for a suitable plastic lumber material, a Rootsradicals member offered to sell me his brand new, unused flight deck, minus the clamps that hold it to the racks. With the cost of the clamps I'd already purchased and the new, unused Flight Deck, I ended up paying pretty much the same as if I'd bought a new one from Xtracycle. C'est la vie. At this point I simply wanted to get the bike done so I was prepared to go a little further over budget.


After weeks of research, patiently buying parts, and a few nights of building here and there, the bike was finally completed.


Stay tuned for "The Xtracycle Shakedown Beer Cruise," coming soon!

The birth of an Xtracycle: Part 2

So, when last we met, the 18 year old Specialized Stumpjumper Pro frame had been cleaned and installation of replacement components had begun. A common theme with this Xtracycle build was to be the necessity of replacing components that turned out to be worn out or otherwise unsuitable for the new build. Unfortunately, this rapidly led to cost overruns. But, in the long run it's better trade out the junk for components that won't frustrate.

Here you see the Stumpy frame with the FreeRadical bolted in place.


The installation of components like the crankset, brakes, stem and handlebars is fairly straightforward so I didn't bother taking any pictures of that. If you've built a bike before you know that most of those components install without needing any special attention.

Here is a closeup of the FreeRadical with the rear V-brakes and Shimano XT rear derailleur installed. The derailleur was later replaced with an inexpensive but toughly-built Alivio unit. No matter how much fiddling I did, I simply couldn't get the XT unit to shift cleanly. It would seem that at some point it took a hard enough hit to push the cage out of alignment. As a result it tended to want to skip gears or shift up or down on its own.


The Suntour front derailleur ended up being one of the only original components circa '94 to remain on the bike. Even it needed a bit of attention though. At some point the cage was bent out of shape and a bit of time with some pliers was needed to get it bent back into proper alignment so that shifting of the chainrings could be done with no difficulty. Originally the bike came with a Suntour Micro Drive crankset. I still have the crank arms in my toolbox, but the chainrings, which had worn out are long since gone. This crankset was a later replacement but had almost no wear on it, so was okay to continue using for the Xtracycle build.


The original Specialized stem and handlebar had to be replaced with something that would allow a less aggressive riding position. The original stem put the handlebars almost three inches lower than the saddle. Great for fast trail riding on technical singletrack but pretty uncomfortable for long distance rides hauling cargo. An adjustable stem and riser bar would make for a more comfortable riding position. Adjustable stems can be great for finding the perfect position for your handlebars, but this particular stem, made by Zoom is junk. In spite of being tightened down as tight as can be, it still exhibits up and down movement under force. I have a Ritchey adjustable stem on my regular commuter bike and it is a far more secure design than the Zoom design. I'll use the Zoom stem on a couple more rides to be sure of my position at which point it will be replaced with a solid stem of the proper angle.


Next comes running the cables. Xtracycle provides a couple tandem-length cables for both the derailleur and rear brakes along with suitable housings and cable ferrules. I'm wearing safety goggles because I like to use a Dremel to cut my cable housings.


Using a Dremel tool with a metal cutoff wheel makes for a far cleaner cut on brake and shifter housings than even using dedicated housing wire cutters. It takes a few more minutes but it makes for a far nicer end result. Kids, always wear your saftey goggles when using power tools. Since I wear glasses, I prefer to use Eye Armor safety glasses since they're designed to be worn over prescription glasses, and they come in their own nifty microfiber bag which can be used to clean the lenses.


Follow up cutting the housing by cleaning out the inside with a small drill bit. I use a 5/64" bit and simply push it into the housing end by hand, giving it a little twist to force it in and clean any burrs that will cause drag on the cables.


The forward most bit of the FreeRadical is anchored in place on the chainstay bridge by a little flat piece of metal that Xtracycle creatively calls a "FAP" for Front Attachment Plate. A simple nut and bolt holds the FAP in place. Xtracycle includes a small piece of self-adhesive carpet to stick onto the FAP so that it won't mar the surface of your bike frame. I found that the carpet piece allowed the FAP to move a bit more than I care for whilst tightening the nut and bolt down, so I encased it in a section of scrap inner tube. Unfortunately, now I had a big block of metal that my unprotected rear derailleur cable was going to have to run across. I envisioned this causing not only drag on the cable but also that the action of the cables movement was likely to chew up the inner tube over time. So, I crafted a little piece of shifter housing with two ferrules to protect the cable on its run along the bottom edge of the FAP.


A couple zip ties hold the mini housing in place on the FAP.


Still to go on the build: pedals, tires, bar ends, and a spiffy wooden deck with a tale of compromise. Stay tuned for, "Birth of an Xtracycle: Part 3!"


The birth of an Xtracycle: Part 1

If you've read my earlier posts, you'll note that I had built and ridden an Xtracycle. This is the story of how this bike came to be. It all began back in what I like to think of as the formative years of my cycling career. It was the early to mid 90s and I'd recently rediscovered the childhood joys of cycling, and mountain biking in particular. My first completely brand-spankin'-new mountain bike was a '94 Specialized Stumpjumper Pro. The bike had been hanging in a local bike shop near where I lived in Atlanta at the time. Apparently, this shop no longer sold Specialized bikes and the owner was willing to make a deal with me. "I want it out of my shop. That bike has been here so long it's having birthdays," the shop owner told me. So, I was pretty stoked to get a bike that should've gone for $1400, for less than $600. This was back in '95 by the way.

So, jump forward quite a few years to the present and we now have an 18 year old mountain bike that saw some pretty heavy use for about five pretty hardcore years. During that time, the solid Tange Prestige Cro-moly frame saw upgrades of virtually every component. In it's current configuration as the donor bike for the longtail cargo bike upgrade, the only original components are the frame and the front Suntour derailleur. I'd had a lot of good times on that bike. Lots of good memories. At one point though, I'd moved to Chicago and discovered much to my dismay, that mountain biking was non-existent anywhere reasonably close to the city. The best riding to be had without a day trip was a place called Palos Hills, south and west of Chicago. I rode the trails once with a friend and found them tame by comparison to what I'd been used to riding in Georgia, and even central Illinois.

So, the Stumpy sat on a bike rack for years, collecting dust because it was simply too much effort to load it in the car for the trek to Palos, and it simply wasn't that fun to ride it along the streets and lakefront path of Chicago. Once I started commuting to work regularly on a far more recently purchased road bike, the wheels started turning (pun intended). As I became more of a cycling fanatic, a utility cycling fanatic in particular, I started thinking more about possible uses for the old dust collecting Stumpy.

At one point, I'd completely stripped almost all of the components off of the frame, intending to sell the various bits by auction or local classified ads. It was then that I somehow stumbled across my first glimpse of an Xtracycle online. It seems that these guys out in California had hit on this amazing idea. You could haul a figurative ton of gear on a bike if you bolted this weird thing to the rear of a regular old mountain bike frame. The bolt-on accessory was dubbed the FreeRadical, and the longtail cargo bike was born. An entire day can probably be lost in looking through the archives of Xtracycle Gallery.com where one can see all manner of mountain bikes, cruisers and the like, repurposed into cargo carrying utility bikes.

It was plain that I'd lost interest in mountain biking and that my Stumpjumper was going to be more trouble than it was worth to sell in parts. Conversion into an eminently more useful cargo bike seemed to be a way to bring some life and usefulness back to a tired old bike. So, I began by purchasing the base FreeRadical unit and P-racks ("P" for "pannier"), from Xtracycle. They offer several different versions of bolt-on models with varying amounts of accessories.

Being somewhat cash-strapped, I decided to try to keep my build as budget conscious as possible. To that end, I decided to make my own deck instead of buying any of the ones sold by Xtracycle, along with making my own cargo bags. What components couldn't be salvaged or incorporated into the new build would be replaced with new bits, hopefully avoiding the purchase of unnecessarily expensive "high-end" or "trick" components.

So, over the next few weeks, I budgeted, searched the online retailers, and eventually purchased enough replacement components to begin the build in earnest.


First though, the old Stumpjumper frame and fork needed to be cleaned and prepped before any new components were installed. Imagine my surprise when I discovered nooks and crannies on the frame still harbored traces of the ubiquitous Georgia red clay, known for its tenacity and incredible power to permanently stain almost anything with a porous surface. Luckily a bit of judicious application of Simple Green cleaner removed all traces of Georgia from the frame.

Once the frame and all threaded surfaces were cleaned the first thing to do was to install a new headset. I'd replaced the original Grease-guard headset with a high tech race-quality needle bearing headset made by a company called Odyssey. Unfortunately, years of hard riding and later, neglect, had left the Odyssey Toro Pro headset with badly pitted and dented bearing races. The whole thing felt grindy and crunchy. Time of a new headset.

So, needing that new headset, I hit up a local bike shop that frequently comes to the rescue when I can't get parts quickly enough from the internet to satisfy my urges for instant gratification. So, I purchased a replacement 1" threaded headset from Smart Bike Parts. I expected something like a generic Cane Creek headset for my $25, but was instead pleasantly surprised to find that it was made by Velo Orange.

So, I carefully installed the top and bottom headset cups using my homemade bearing cup press which consists of a 12" piece of 5/8" diameter threaded rod along with several large fender washers and a pair of channel lock pliers combined with an adjustable wrench. It's not pretty and it can be a bit tricky to use, but it gets the job done for a fraction of the cost of the cheapest headset press out there.

Here the lower bearing cup is being installed.

You have to pay close attention as you tighten the nuts down, making sure that the cup gets pressed in evenly all around. This is the one major failing of this type of homemade tool. It works great for cheap, tough headsets, but would probably ruin any lighter weight race or performance type of headset. Here you can see me eyeballing the cup as I tighten the bolts.

The original stock rigid fork goes back in and the last bits of the headset are installed and tightened down. The rigid fork had been replaced by a Manitou 3 elastomer suspension fork. Luckily I still had the original fork as the elastomers had long since collapsed from age and heat exposure.

The last bit to go on before the rest of the build is the bottom bracket. Luckily for the budget, the bottom bracket probably only had about 100 miles on it, even though it looked pretty cruddy. A bit of cleaning with a wire brush and it could be reinstalled. Those venerable Shimano UN55 sealed bottom brackets are cheap, heavy, and tough.

Installed and looking nice and clean.

And the beautifully cheap and simple VO headset.

That seems like a good stopping point. In "The Birth of an Xtracycle: Part 2," you'll see all of the rest of the components being installed, along with a innovation or two.